9.21.2014

My Book

Hello!

The school year is now officially underway, which of course means that my brain is just about bubbling with equations and monomers and the Civil War and the present tense of Spanish verbs. I have never really been overwhelmed by school, because I genuinely like learning and gaining new knowledge. However, this year, we are three weeks in and there are days where I feel like I'm drowning in school-work, which is never good. So, last week, I decided to start a new, on-going project that would have no deadline and would serve no purpose other than to distract me from school and to give me an accessible creative outlet for the days where it all gets to be too much.


This is My Book, or My Book of Inspiration and Happy Thoughts. Basically, it's going to be a compilation of things that make me happy. For the outside cover, I took pages from a book of poetry I bought for $0.75 at the library (if you ever need books for a project, hit up your library they always have books for sale for really, really cheap) and used Mod Podge to glue them to the book's front and back cover. There are a few air bubbles, but really it isn't that bad and the Mod Podge also acts as a varnish so it's all nice and polished. 


For the inside cover I cut out a road map and glued it on to hide the mess of the book pages. 


I found a bunch of pictures that I've liked over the last few months on Tumblr, printed them out and made a collage across the two first few pages.They're pretty and they make me happy, so they fit. Over time I think I'll also add pictures of myself, my friends and family. I'm also going to have poems and quotes written in. The page after this one has the list of my recent music obsession, which I will link you at the end of this. 

If you want a fun, stress-relieving project, I suggest this. It was inspired by my journal for art class (yes, I'm finally taking an art class and it's amazing). You can get an 8.5x11 notebook at a local arts and crafts store for about $10 and everything else is either printed or thrifted, so it really doesn't cost much. The best part is that there are no rules and no deadline, it's basically a visual brain dump. It's a lot of fun. 

I hope you have a great week!


9.01.2014

I'm back in the game

Hello!

How have you all been this summer?

I know I was gone away for a (really really) long time, but now I'm back and the good news is that I have had time to make a lot of cool things that I'm super excited to share with you guys.

The first is a huge project that I gave myself a stupidly short amount of time to do, but as it was a gift for a (relatively) newborn baby, I had a deadline.


I made a whole baby quilt. In about two weeks.
I didn't think it would be such a huge project (because I'm naive and also because I've never made a quilt before) but boy was I wrong. Wow, this was such a huge thing to get through.


Picking the fabric is obviously the first step and being the unorganized sewer that I am, I only had a vague idea of what I wanted. I knew it was going to be for a girl, so I thought "pink", but then I thought "I don't want to indulge the stereotypes that all presents for girls must be pink, so maybe gray" and then I realized that pink and gray is one of my favorite color combinations and hey, there you go, that's my color scheme. Then my mom and I started looking for fabric, which was a challenge in itself because it's surprisingly difficult to find gray fabric that is cute enough for a baby and pinks that are all in the same tone. Then we found elephants and I was sold, so the official theme for this blanket is pink, gray and elephants.


The actual sewing process was not hard so much as time consuming, it's all straight lines but when you have a quilt that's going to be nine squares by eleven, it takes a while. I'm still amazed I didn't mess up in the pattern. I actually based it off a quilt my mom made me when I was a baby. 


The batting was a battle, which I won, but it was all twisted and pulled and didn't fall into place correctly, but the mistake isn't visible so how much of a mistake is it really?


So it turned out kind of massive, and I can't really say the process went smoothly because I did spend a while pulling out stitches and then sewing things back up, but the result was, if I do say so myself, quite nice. I'm very proud of it, but I'm not sure I'll be making another quilt anytime soon. I'd never made one and I wanted to, now I have and I'm good. 


What really matters is that the gift was well-received (which it was) and that it will be put to good use (as you can see by this little cutie, it already has!). I'd say she's pretty happy with it, wouldn't you?

Hope you all had a fantastic summer and I look forward to sharing more projects with you this year!

- Blue Cat


6.17.2014

This is but the beginning

Hello!

This summer my goal is to re-decorate and redesign my room. I've lost count of how many times I've planned to do that over the years, but this time the wheels are already set in motion, so I know for sure that some re-decoration will be occurring, and has in fact already begun to occur.


So I went fabric shopping on Friday, which was my long-awaited self-reward for passing my chemistry class. I had projects in mind, just not really fabrics or colors. My general strategy for fabric shopping usually consists of walking in and finding a pattern or color that I like and going from that.

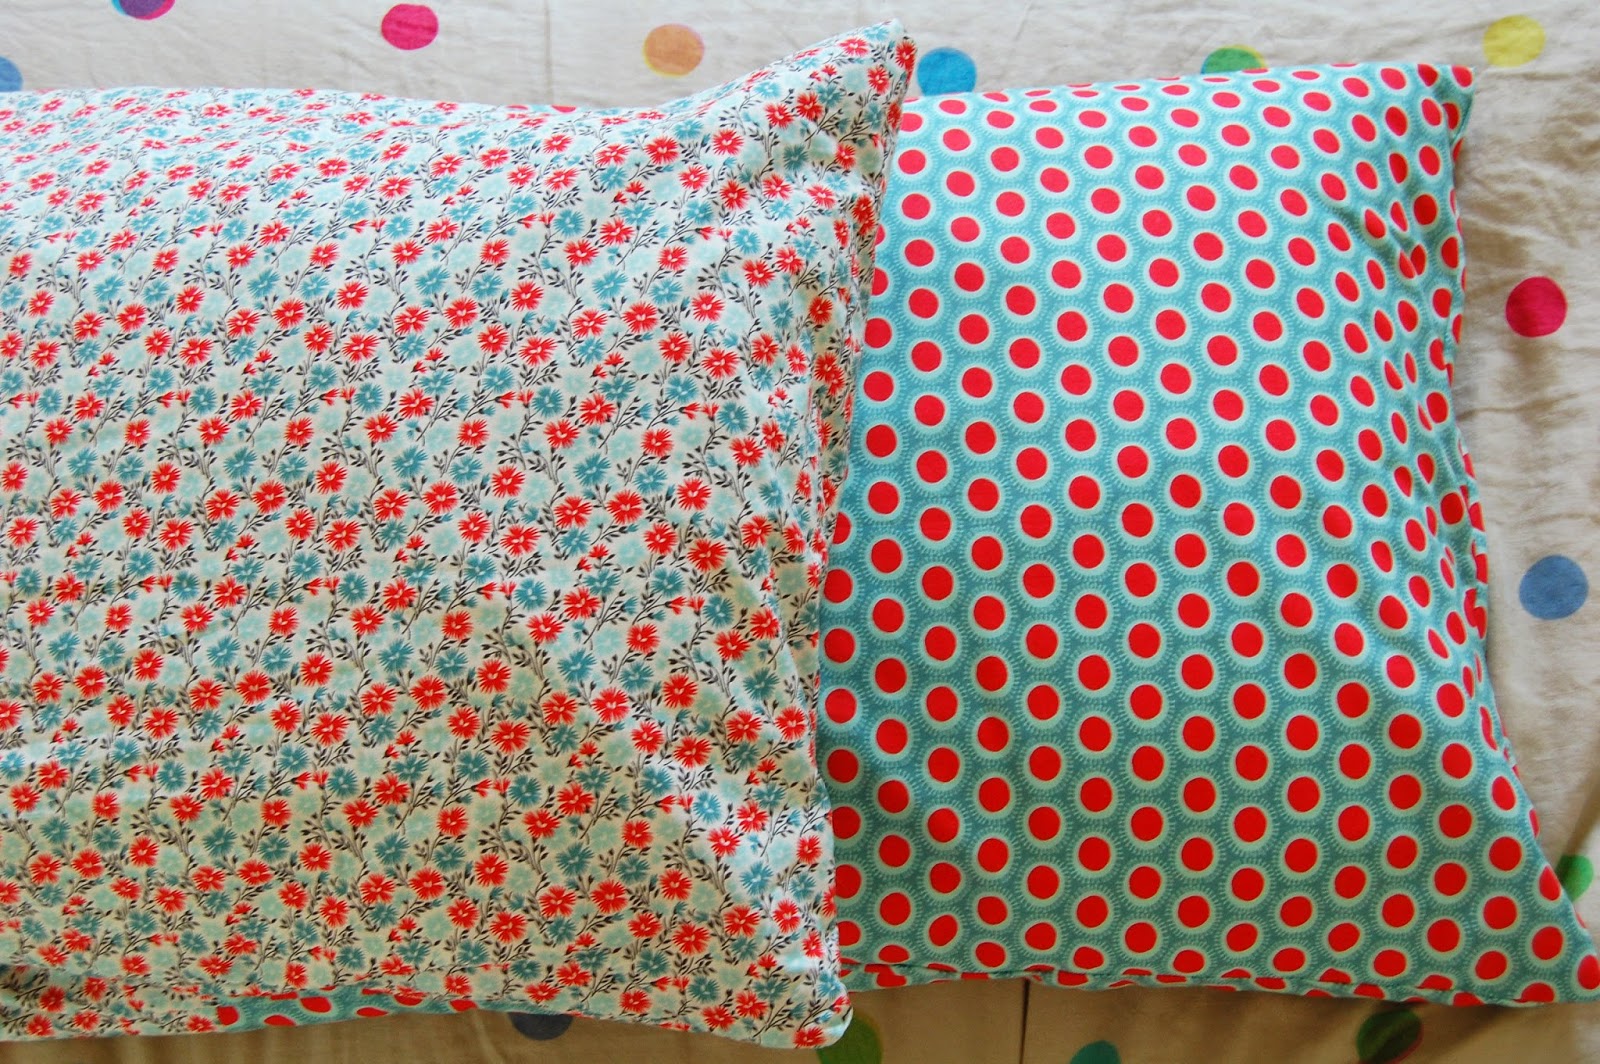
In this case, for the pillowcases, I found the flowers first and the polka-dots second. They went really well together, so I just switched the body and the header fabric for both, so one flower with a polka-dotted end and one polka-dot with a flowered end. 


For those of you wondering, the adorable dinosaur pillowcase I made last year tragically ripped and can no longer be used. I did keep the fabric though because it's so cute. 

So yes, super simple pillowcases. Next and more importantly, I made a huge blanket. 


So this blanket has been on my list of projects to do for a while. It's basically two squares of fabric sewn together, one dark gray fleece and one flowered cotton. Of course, it wasn't that simple to make. The cotton is sold in a thinner width than the fleece so I had to get twice as much of the cotton and piece it together to match the back. Then pinning it was a struggle, a situation that my cats tried to rectify by falling asleep on the fabric. However, the actual sewing was very easy. Straight lines, leaving an opening on one side to turn it right side out and then hand sewing that part shut.


So there you have it, the first wave in the room makeover. I will keep you updated on the progress of this transformation, I have several ideas that's I'm excited to share with you.

Have a fantastic start to summer!

5.20.2014

It's that time of year again

Hello!

Yes it is that time of year again, the time where instead of craving Nutella and hot chocolate, I crave smoothies and watermelon. Both of which are significantly healthier, I think you'll agree.

Now when I get home from school, my automatic reflex is to grab the blender, a banana, some frozen strawberries and whatever else I can find that would taste good and make a smoothie. On good days, it takes approximately 2.5 minutes. On bad days (the running into things and tripping over flat surfaces kind of days, you know what I'm talking about) it can take up to 10 minutes cause I forget that yogurt does not make a smoothie liquid enough to be blendable.

Today was a good day.

And today I somehow made a vegan smoothie, which turned out to be the best I've ever made, so I decided to share the recipe with all you good people.


I apologize for the phone picture.

Here are my super accurate fool proof instructions on how to make the most perfect watermelon strawberry banana smoothie.

1. Grab blender. Do not forget to plug it in.
2. Grab watermelon. The kind that is sort of mushy and gross that no one wants to eat works very well. Make a fist. Add the same amount of watermelon as the size of your fist. Maybe a bit more.
3. Add a handful of frozen strawberries. 
4. Add a banana torn into little chunks.
5. Blend. 
6. Put in fridge as you clean up your mess.
7. Find a straw. 
8. Get a stool to reach straw on top shelf. Don't fall off of stool.
9. Add straw to smoothie and sit on porch instead of doing chemistry homework.
10. Enjoy the fact that you are having the best smoothie you've ever made instead of doing your chemistry homework.

For my first ever recipe post, I'd say that went pretty well.

Enjoy your smoothie. 

4.20.2014

The blogger to the detective


Every Sherlock needs a Watson and of course, my Benedict Otterbatch needed his as well. The internet has decreed that if Benedict Cumberbatch (Sherlock Holmes in Sherlock BBC) is an otter, then Martin Freeman (John Watson in the same) is a hedgehog. I find this resemblance to be accurate and because the internet's wish is my command, I made a little Hedgejohn Watson to accompany the Otterbatch detective on his adventures. 


Designing a pattern for this little guy was an adventure in itself. I basically meshed a bunch of different animal pattern together, cut a big hole in the back to replace with longer fur and made him a mohawk. 


The scarf is black and white because in Sherlock BBC, John wears a black and white striped shirt, and its become a bit of staple John Watson outfit. 


I'm quite proud of his back fur, it looks enough like spikes that he doesn't look like a weird bear. In my opinion, I mean maybe he does, but I don't think so. 


I love his punk rock hair. 

If you guys want your own little John Watson or Sherlock Holmes, you can head on over to my Etsy shop. However, I suggest you wait for a bit before buying these little guys. I have a few changes in mind and a few deals for you all, so be patient for a few weeks more and you will be pleasantly surprised. However, if you want to buy one now, feel free, I'm not going to stop you!

Have a great week! And a great Easter, if it applies. 

3.23.2014

It's really not that easy

Hello!

As a crafter-sewing-knitting-person, I have to find some inspiration somewhere.

That's what I use as an excuse when I spend hours looking through various social media at things people have made.

What I've noticed while browsing through blogs, Pinterest, Tumblr, you name it, is that there are a lot of projects that are two steps long or something and say "You can do this really quickly and easily."

NO. You can't.

I thought I'd give it a go anyway, because I needed a quick and easy but cute craft for my friend's birthday. I knew she loved Mason jars and I thought "Who else loves Mason jars? Oh that's right, most of the Internet." So off we go.

I found this idea for a hot chocolate mix that I really liked and decided to follow it. So we begin. I will write here an accurate instruction for this project.

Ingredients/materials:

  1. Unsweetened baking cocoa (2 cups)
  2. Sugar ( 3/4 cups)
  3. Chocolate chips (more rather than less)
  4. Mason jar
  5. Marshmallows
  6. Ribbon
  7. A paper tag


1. Gather your ingredients. And by that I mean, have your mom drive you to various stores because you can't drive and none of them are within decent walking distance. Find Mason jars. Go to next store. Spend ages finding unsweetened baking cocoa. Also grab extra chocolate chips because you didn't check if you had enough at home. You're pretty sure you have sugar at home, so you don't get any. Luckily you do have some.


2. Mix cocoa, sugar and chocolate chips. Promise your brother some when you're finished. Try not to get it all over the windowsill. Did I mention you have to do this around 5 o'clock when the lighting is starting to fade away slowly but surely?


3. Move to the kitchen counter for added precaution. Realize that you are hopelessly clumsy and decide that making a funnel out of printer paper is a good idea to avoid getting chocolate mix all over the counter as you pour it into the jar. You are wrong. The counter will be coated in a beautiful dusting of chocolate within 20 seconds of beginning this operation. When this is done, you realize that you said you would give some to your brother, so you scoop some out of the jar. Then you realize that  it only fills about half the jar, so you close it and ponder possible solutions.


4. The next day, get marshmallows at the local market when you get off the bus after school. Hurry home before the light fades and you can't take anymore decent pictures. Get mini marshmallows because you'll be able to put more in the jar and also you'll feel less guilty if you eat more, because they're smaller right? Stuff the marshmallows in the jar to the brim. Decide to wait until the next day to finish decorating the jar and to take pictures.


5. Add two ribbons to the lid. This step went relatively well.


6. Realize you should probably add a tag to the jar. Remove ribbons and write nice message on a paper tag before tying the ribbon up again.


7. Admire your finished product.

So you see? All the blogs and pictures that makes little projects seem really easy are hiding the real aspect of doing any kind of craft. It takes time, forethought and also a driving license. Although you can manage just fine without one, but it does help.

In the end, this was fun project to do and the taste was approve by my brother, so it must be good. Also, I do really love Mason jars. I bought one for myself, I don't really know what I want to do with it. I keep seeing recipes that have salads or desserts in Mason jars and I kind of want to try it. I'll keep you up to date.

I will be taking something of a break from sewing for a while, due to the fact that I stuck a sewing needle in my knee, that I made a dress two sizes too big and that I will have neither the time nor the patience for sewing in the next few weeks. However, I can't ever not do anything, so we'll see what happens. Stay tuned for more Blue Cat misadventures!

(PS. Tell me what you think of the bigger pictures! I kind of like them, I might stick with them.)

3.21.2014

Mishaps and lost cords

Hello!

I made a shirt a while ago.

Why?

Because it's part of the Wardrobe 2.0 project. I didn't call it Wardrobe 2.0 in my previous post, but it's a catchy name so I'm going to keep it. Anyway, moving on.

I made a shirt.


In fact, you can make this shirt too. Using this pattern here. It's very easy, I'm not gonna lie, but since I made it there were obviously a few screw-ups.


The first occurred with the fabric. It's very pretty, I love it. The main body is a dark gray with white and lime green polka-dots. The one for the sleeves, I have used before and I will use again because I adore it, is lime green with creamy-white polka dots. But see here's the thing. I got basically twice as much of the gray fabric as I need. Why. Why does this always happen? I din't think I've ever bought the right amount of fabric. I don' know how I do it, but I always follow the pattern's instructions as well, which is why I don't understand why I never get the right amount.

As it turns out however, it's probably a good thing that I got too much, because I screwed up again.


(And yes, I realize all these pictures are basically selfies. It's okay.)

I made this shirt too small. 

Yup.

It's less obvious in these pictures, but it is very small on me. I have to wear a tank-top underneath it because it's too short. Which was fine, I can deal with that.

But then I washed it. (Well my mom washed it, but the story is that it got washed.)

Now it's much too small for me. Much too small. 

Because I am an idiot and I didn't wash the fabric beforehand. 

So, moral of the story.

  • Always wash your fabric before cutting and sewing pieces into it.
  • Double check your measurements. "It's fine" is not fine. (All my sewing projects have the words "it's fine" somewhere in them. Learn from my mistakes.)
  • Use bias tape for the sleeves and collar. Trust me, just do. Unless you're good at sewing or something, but bias tape will save your life.
  • The pattern is great, I'll be doing it again, probably in the same fabric, but I would go one more size than you would think you need, and also I will be adding 2 inches to the bottom hem for a little more length.
There you go.

And as for the obligatory apology for the lack of posts, I don't owe you one, but I do have excuses. Well, one excuse. I lost the cord that connects my camera to my laptop and while I have several posts lined up for you guys, I don't have any pictures, which takes away from the whole point. Also, I have had very little time because my last show of the year is coming up and I am in charge of a whole costume, which is a little very stressful and time-consuming. So there you are, excuses. 


Hope you enjoyed! (I swear I have better pictures of this shirt, but they're all on my camera; I took these ones before I lost the cord.)